Tuesday, March 28, 2023

TLSv1 and Pentesting Woes

While testing a system today I ran into a webserver that was shockingly still requesting/supporting TLSv1. While TLSv1 has been around for a long time, most browsers/clients will be configured to not attempt to negotiate TLSv1 or TLSv1.1. For end-users, this is great from a security standpoint but from a pentesting stand point, we may still need to interact with that system! 

The system today caused errors with everything from OWASP ZAP to Nikto to even the CuRL utility! Luckily Parrot OS (and most other Linux systems) support configuration changes to allow the system and tools to still communicate with an old system running a TLSv1/TLSv1.1 webserver. 

First off here were some of the errors I was getting while trying to interact with the system.

  • ZAP - The server selected protocol version TLS10 is not accepted by client preferences [TLS13, TLS12]
  • CuRL - error:1425F102:SSL routines:ssl_choose_client_version:unsupported protocol
  • Nikto - No web server found on X.X.X.X:443 (This one was odd as the error was not particularly indicative of the underlying error)
  • nmap - No clear error messages but nmap failed to really be able to determine anything about the website/webserver

Now before beginning; Obligatory disclaimer. WARNING: Following the next steps will lower the security of the system! It is HIGHLY recommended that these steps not be performed on a system that is used for sensitive operations such as logging into email, bank accounts, credit card providers, etc. These steps are meant to enable a dedicated penetration testing station to access older crypto systems. I take zero responsibility for any damages that come from following this guide!

Disclaimer out of the way, let's walk through how to configure OpenSSL to allow older TLS versions system wide first. On many Linux systems, the system wide OpenSSL configurations are usually stored in the openssl configuration file ( /etc/ssl/openssl.cnf on ParrotOS and many other Debian systems). Within this file, there is a section labeled '[system_default_sect]'. On the current version of Parrot OS, the systems settings will look like this:

[system_default_sect]
MinProtocol = TLSv1.2
CipherString = DEFAULT@SECLEVEL=2

To allow the system to connect to order TLS modes, the settings can be changed to the following:

[system_default_sect]
MinProtocol = TLSv1
CipherString = DEFAULT

Save the changes and it should be noted that many command line tools are likely to start communicating with TLSv1 systems. Take a look at the difference in CuRL with the change versus after the change in the below screenshot (Top error is MinProtocol set to TLSv1.2 and the bottom is TLSv1; The self-signed cert is a completely different issue).


The above solved the issue for many of the command line and other system tools but firing up ZAP later presented the same issue even though other tools were working just fine. Turns out that ZAP, since it relies on JAVA, had it's own configuration parameters that take priority over the system level configuration. Getting ZAP to ignore TLSv1 was a two step process. The first step is changing JAVA's security configuration as well as enabling ZAP to use TLSv1.

Let's first set JAVA's security to support TLSv1. In Parrot, and many other Debian based systems, the JAVA security settings are configured in the file /etc/java-11-openjdk/security.java.security. Within this file, locate the configuration option labeled jdk.tls.disabledAlgorithms. One will notice that TLSv1 and TLSv1.1 are disabled by default.

Java Disabled Algorithms

To enable JAVA's support for TLSv1 and TLSv1.1, simply remove those two options from the line and save the changes. NOTE: Remember this will affect all applications that use JAVA on the system!

Now to get ZAP to scan a site utilizing TLSv1/TLSv1.1. With the JAVA changes saved, launch ZAP. Once ZAP launches, navigate to Tools -> Options.

ZAP Options

Once the menu loads, scroll to the 'Network' section and then click on the 'Connection' option. Within this menu area, there will be a number of security protocols that can be selected. Notice that TLS 1 and TLS 1.1 won't currently be checked but can be selected by clicking the check box next to them.

Enable TLS in ZAP

Click okay and then begin scanning the TLSv1 enabled website! 


As a final reminder, following these instructions will lower the security of a system. Penetration testing systems like Parrot and Kali shouldn't be used for normal daily tasks and the changes made in these instructions should be reverted once the need has passed!

Tuesday, February 7, 2023

CeWL and Parrot OS

Back with another learning moment. This time CeWL and Parrot OS are the culprits. Normally CeWL can be installed through most package managers. Sadly with the current version of Parrot (v5.1.2 Electro Ara) CeWL has a dependency problem and attempting to install it with apt will result in the error: 

ruby-mini-portile2 : Breaks: ruby-nokogiri (< 1.13.2) but 1.13.1+dfsg-2parrot1 is to be installed

Not a fan of getting too crazy on daily use systems but after a little bit of research into Ruby and reviewing CeWL's git page, a reasonable solution was discovered. I was hoping that Ruby had something similar to Python's virtualenv, which it appears Ruby does, but getting it setup/configured is apparently a headache. The alternative solution is both interesting and functional. Hopefully, Parrot's devs will have CeWL's dependencies fixes soon as well and this article will be obsolete!

Installation

The first step is to make sure git and bundler are installed on the system. Parrot should already have git but just in case it doesn't make sure to install it with apt. Bundler is likely not already installed but can be installed with 

apt install bundler

Next, create a directory where CeWL's repo should be downloaded. I tend to make a 'repos' folder on in my home directory on testing systems in order to centralize all the extra tools I place onto my testing systems.

Now with the source of CeWL obtained, the Gem tool can be use to install the dependencies for CeWL without changing the system-wide Ruby installation. To do this, create a folder called 'gems' in the CeWL folder. Then a special environment variable will be set in order to install the required Gems into the newly created folder in CeWL's source.

Assuming the above environment variable, associated folder have been created, and the current directory is the CeWL directory, the bundler command can be used to install the required Gems for CeWL. Note: that exiftool is required and there will be a warning message after Bundler completes. In Parrot, libimage-exiftool-perl, can be installed to meet this requirement.

If there weren't any errors, CeWL should run without errors. Note that since this folder is unlikely to be part of the PATH environment variable, CeWL will have to be launched from this folder currently.

Victory! There are some drawbacks to this setup but if you completely understand all the shortcomings of this band-aid fix, the feel free to crawl on your merry way (terrible pun intended!).

Caveats

As mentioned above there are some shortcomings of this fix in its current state. 

  1. The GEM_HOME env will have to always be set before invoking CeWL
  2. CeWL has to be run by specifying the path to the Ruby file (cewl.rb) due to this directory not being in the PATH environment variable

Most Linux user's will have their own preference on how to solve this issue but here's how I approached the situation while leaving as much of the rest of the system unchanged as possible. Leveraging the .bash_aliases file, I created a function that sets GEM_HOME, runs CeWL, and then unsets GEM_HOME. The benefit of this approach is the system defaults for Ruby are only modified when necessary but I can still run CeWL as though it were installed system-wide! 

This method, as shown, is bash specific and relies on ~/.bashrc sourcing ~/.bash_aliases so the fix is user specific but is easy to add to other user's configurations as necessary. CeWL also never needs root privileges from what I can tell so this is likely sufficient for any non-root user.

Breaking the contents of ~/.bash_aliases a bit.

  1. The first line declares a BASH function called 'cewl' 
  2. Sets the GEM_HOME env variable to the Gems folder where the dependencies for CeWL were installed earlier
  3. Runs CeWL and passes all the command line args to the cewl.rb script
  4. unsets the GEM_HOME variable so that any system-wide changes can still be made by the package manger as needed
  • Note: Make sure the file paths in 2 and 3 are corrected to match the system this function is being created on!

Make sure that ~/.bashrc, ~/.profile, or the system-wide equivilants contains the following lines as well.

After the changes have been made to the proper files, open a new terminal and see if the new 'cewl' function is working (it is important to open a new terminal as this is a quick way to source the new changes in bash_aliases or source them in the current terminal).

Notice that GEM_HOME is blank before and after the invocation of the cewl tool. The final test is to make sure that arguments are being passed properly.

Note: There's still the slightest potential for a hiccup should the user ctrl+c while cewl is running though so the solution isn't perfect. In the event that cewl.rb is stopped early, GEM_HOME may stay set until cewl is allowed to complete or the terminal is closed. I'll continue working on this to find a better solution for traps.

Regardless, success! While not as nice as apt installing something, this process acts as a good one of for tools that have odd dependencies! Hope this can be of use to others out there.

Tuesday, December 27, 2022

OWASP ZAP - Leveraging Processors while Fuzzing

Since it's December and there's loads of Holiday CTF's and other fun things to do in spare time, I decided to hop into TryHackMe again to just practice some techniques in random rooms. Hadn't been on THM for a while but noticed that my 'Skills Matrix' on the site was glaringly deficient on Web Applications. A quick search for some free rooms turned up one called Corridor available here.

The room is an easy room but was certainly a quick/fun challenge. It also forced me to learn how to leverage ZAP's Fuzzing payload processor for a change. Normally I've not needed to do much else with ZAP's Fuzzing configurations beyond selecting a payload. So learning experience turned into blog post!

About the room:  You have found yourself in a strange corridor. Can you find your way back to where you came? 

In this challenge, you will explore potential IDOR vulnerabilities. Examine the URL endpoints you access as you navigate the website and note the hexadecimal values you find (they look an awful lot like a hash, don't they?). This could help you uncover website locations you were not expected to access.

Sounds like a good time so let's dive in!

Upon connecting to THM's VPN, the website for Corridor was accessible at htt[p]://10.10.103.96 and was quite literally a corridor of 'empty' rooms. 

Corridor Main Page

Clicking on any of the doors simply leads one to an empty room with no clear way on how to escape! Time to fire up ZAP to take a closer look at things (Yea yea, obviously ZAP is already opened in that screenshot!). With ZAP loaded up and FireFox proxying requests to ZAP, the site was spidered. This turned up some interesting requests for each of the 'doors'. 

GET Requests for Doors

Interesting... Each request to the page corresponding to each door appears to be an MD5 hash! Let's see if they are crackable! Viewing the source of the mainpage, all the room links are visible and can be copied into another document and then John can be let loose on the hashes.

Hash Cracking with John

Well, John figured those out in a hurry... Looks like each MD5 hash simply corresponds to a number! That makes things easy. Since the name of the room is 'corrIDOR' and the description mentioned teaching about IDOR (Insecure Direct Objection Reference), there's probably a good chance there's some other hidden pages. There's a number of ways to check but let's leverage ZAP's fuzzing tool and practice using payload processors.

From one of the requests, right-click and mouse over 'Attack'. In the Attack sub-menu, click on 'Fuzz'.

Launching ZAP Fuzzer

From the Fuzzer window, the part of the request intended to be 'fuzzed' is the MD5 hash portion of the GET line. Highlight just the MD5 hash and then click on the 'Add...' button to add that location as a Fuzz location.

Adding a Fuzz Location

The next screen will prompt for a payload for this Fuzzer location. As determined earlier with John, the website appears to use MD5 hashes of the numbers 1 through 13 so let's try a range of numbers from 0 to 50 as our payload to see how the site responds. To do this, click the 'Add...' button in the Payloads window. In the new window that appears, click the drop down menu for 'Type' and select the type 'Numberszz'. Notice that the payload window will change and asks for some information about the numbers. Let's start from 0 and go to 50 incrementing by 1. Once done, click the 'Generate Preview' button and notice that the 'Payloads Preview' window should populate.

Payload Generation
Assuming the payloads preview now shows the list of numbers, click the 'Add' button at the bottom of the window. Now it's time to tell ZAP to modify this list of numbers to reflect the MD5 hashes that the web application expects in the requests. ZAP calls this processing and can be done by highlighting the newly created payload and then clicking the 'Processors...' button from the payload window.
Adding a Processor

In the 'Payload Processors' window that opens, click the 'Add...' button. Then under the 'Type:' drop-down, let's find the 'MD5 Hash' option and then click the 'Generate Preview' button to test the transformation. If all goes well the 'Processed Payloads' section should now show MD5 hashes of the corresponding number from the Payloads list!

Processing Payloads

If the MD5 hashes populated, then click the 'Add' button at the bottom. Then Click 'Ok' in the 'Payload Processors' window as this processor is now setup and ready to go. Finally, before closing the 'Payloads' window, confirm that ZAP is setup to apply everything that was just configured. 

Confirm Payload Processing

From the above screenshot, it looks like everything is ready to go. Let's Fuzz this website and hope to finding something useful to escape the Corridor! Click 'Ok' in the 'Payloads' window and then click 'Start Fuzzer' in the 'Fuzzer' window. Notice that the bottom section of the ZAP user interface will switch to the Fuzzer tab and show the requests being sent as well as the responses from the server. Since only 50 requests were being sent, this process won't take long. 

Reviewing Payloads

Notice in the Code/Reason sections that there is a number of 404 errors, meaning the webserver didn't have that page. Let's scroll back up to the top of the fuzzer history. Notice now that there's a bunch of 200 codes which often means the webserver found/returned something to the request! It was already noted that there were 13 doors but looking closer at the requests, 14 requests received 200 codes and one of those requests differs in size from the others; how interesting... 

Different Responses
Let's see what that request looks like in the browser. Right click on the request and then select 'Copy URLs to Clipboard' to paste in the ZAP browser or click on 'Open URL in System Browser' to have ZAP open the link automatically in the system browser.
Found the Flag

Success! Zap helped to quickly try a bunch of possible pages even though the requests needed to be transformed before being sent. The payload could also be expanded to be an even large list of numbers or even words that are hashed in an attempt to "hide" pages from folks on the Internet. 

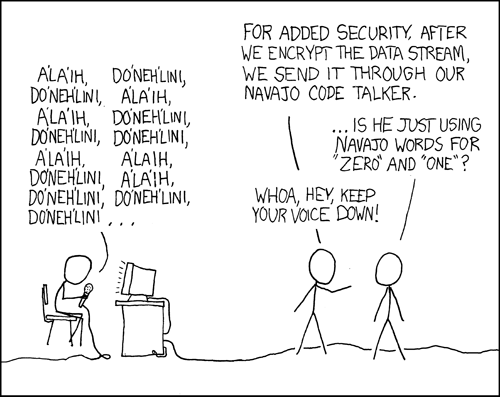
Remember security through obscurity is typically frowned upon!

Relevant XKCD