It never fails that vendors update firmware on systems but neglect to provide an easy way for anyone outside of Windows an easy way to apply the updates. HP tends to be one of my favorite vendors as they tend to support the open-source community when possible but recently a laptop needed a UEFI (BIOS) update. This happens on a fairly regular basis and each time I always think to myself that I should document how to do this since I always have to fight with the update to get it to install without needing FreeDOS or booting Windows on the laptop.The laptop in question today was an HP Elitebook that had a BIOS update available but no means to install via a Linux distribution. Not to worry though as it is still possible to this update without Windows or FreeDOS.
In order to perform this update process a Linux system and a USB drive will be needed. The Linux system in this scenario is again an HP Elitebook. The USB drive doesn't need to be a large USB drive, the device only needs about 32 MB of space but it is crucial that the device not contain any important files! This USB drive will be formatted and all data will be lost. The next thing to do is to download the BIOS update from HP's site. Many times in order to get the update from HP's site, one will need to act as though the computer is running Windows. Accomplishing this is as simple as visiting the HP support site and selecting Windows as the operating system.
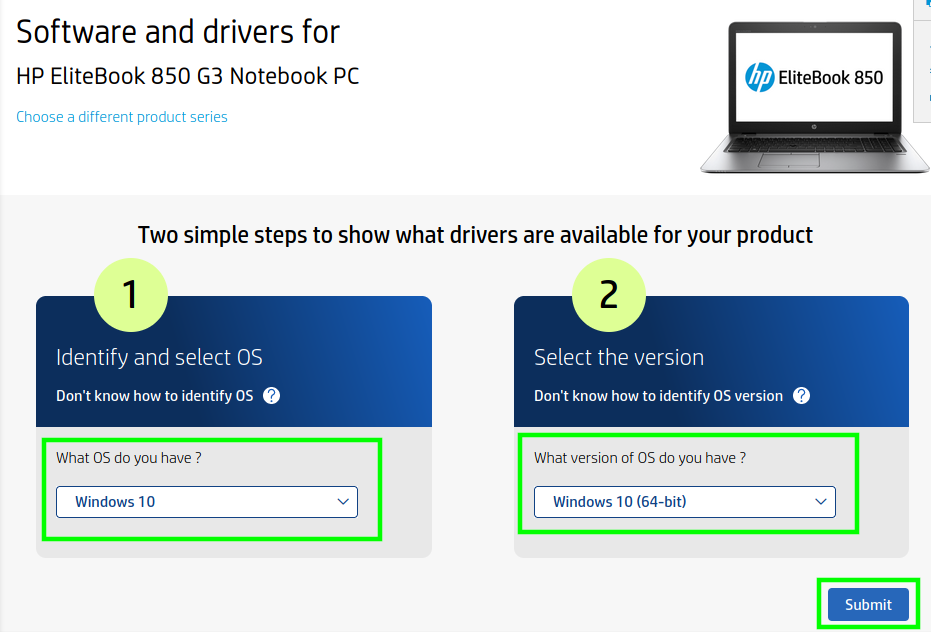
By selecting Windows as the OS, the HP site will continue on to the software updates. Selecting the All drivers followed by BIOS category will show the most recent BIOS update. Simply click the download button to obtain the executable; don't worry that it is an exe.

Now open a terminal, plug in the USB drive, and let's prepare the USB drive. The first step is to locate the device name of the USB drive and then format it properly. In order to accomplish this, the user will require sudo or root rights on the system the USB drive is plugged into. To find the device name of the USB device, the 'lsblk' tool will be leveraged. As seen in the figure below, the USB drive that will be used in this article is /dev/sdc and is highlighted in green. WARNING: Triple check the device name before continuing as permanent data loss may follow!

With the proper USB drive name, the drive can now be prepared by partioning and creating a filesystem on the device. The 'fdisk' utility can be leveraged to quickly create a new partition on the located USB drive. WARNING: Make absolutely sure that the proper device is picked for the fdisk command! Command used echo -e 'n\np\n1\n\n1048576\nw\n' | fdisk /dev/sdc

Now the 'mkfs.fat' utility can be used to format the newly created partition; /dev/sdc1 on this system. WARNING: Make sure to confirm the partition name before continuing! Command used mkfs.fat -F 16 /dev/sdc1. Once the device has been formatted, it will need to be mounted to the Linux system where the BIOS update was downloaded and then a specific folder structure created in preparation for the update files. Commands used: mount /dev/sdc1 /mnt && mkdir -p /mnt/Hewlett-Packard/{BIOS/New,BIOSUPDATE}.

Now that the USB drive is prepared, let's extract the necessary files from the HP update downloaded previously. In a terminal window, navigate to the folder where the file was downloaded. Leveraging the '7z' tool, the contents of the update can be extracted. Command used: 7z e sp146435.exe

With the files extracted, the BIOS binary update file should be copied to the USB drive. The BIOS binary file will be the file ending in .bin and it should be moved to /mnt/Hewlett-Packard/BIOS/New/ folder. Command used: cp *.bin /mnt/Hewlett-Packard/BIOS/New/

Once the files are moved, make sure to sync the device and properly eject the USB drive from the system. Command used: sync;sync; umount /mnt && eject /dev/sdc.
Now remove the USB drive and plug it into the HP laptop that the BIOS update was intended. Note that the laptop will need to have a charged battery as well as be running with the AC adapter connected! With the USB drive plugged into the laptop, turn the machine on and press the escape (esc) key when the HP logo is seen. The startup menu will load and towards the bottom of the menu will be an option to update the system's BIOS. Use the arrow keys or mouse to highlight that option and select it.

The next screen will prompt for confirmation to install the new BIOS firmware. Simply click on the button that says Update BIOS - X.XX.

This will start the update process which might take some time. Simply wait for the process to complete. There will likely be multiple reboots in order for the process to complete. Remain patient!

This particular HP laptop rebooted on its own and continued the BIOS installation process. Again this is normal. Do not remove the USB drive or the AC power supply!

After another reboot, the laptop booted back into my normal Linux distribution and a quick look at the BIOS version with dmidecode showed that the laptop was now reporting the new version of the BIOS software from HP! Hopefully this is helpful for other Linux users out there wishing to keep their BIOS versions updated.